Friday 20 November 2015
Thursday 19 November 2015
The World I Live In: Evaluation
The World I Live; Evaluation
For this project I have planned, researched, experimented, designed and produced a final piece based on how I see the world I live in. Over the summer I have created a sketchbook which shows how my ideas develop and also change. I found that over the summer time management was the main issue of not fully producing 9 weeks of work. I work fairly slowly and I see myself as a perfectionist. I always make sure that I complete a piece of work before moving onto the next and I feel this is why I fell behind. However I found a solution to this particular problem, I set myself daily targets making sure I completed enough work each day to catch up and it helped me greatly. Eventually I caught up with the rest of my class and I could move onto the next step of the project at the same time as everyone else. If I was given a project similar to this again I will make sure I am more organised and I set myself targets right from the start.
I knew as soon as I was given the project title ‘The World I Live In’ I was going to focus on the beauties of nature. Nature is a particularly big aspect of the world I live in. It is all around us including plants, animals and landscapes. Nevertheless I narrowed it down to flowers, leaves and plants because I thought I could create something beautiful using these. Without plants us humans would not be living and we need the oxygen they produce therefore I think using natural objects such as flower petals would not only produce a beautiful final piece but show the importance of nature and how it fits together perfectly with this project. After coming to the decision of basing my whole project on nature I began to undertake some primary research, this included taking photos of my favourite parts of nature such as trees and flowers. Conversely I didn’t just take photographs of any random trees and flowers, I especially went down to my grandad’s garden and took photos of the natural forms he has planted or grown himself as he is also an important part of my world. Moreover I took photographs of my littlest sister looking and handling these flowers as I adore her and in some way I wanted to include her into my work.
I then went onto developing my research. Not only did I photograph my littlest sister I also had ago at drawing her yet I do not particularly like using this media as I prefer to draw using a needle and thread rather than pencil. Nonetheless I still had ago as I wanted to push myself to do something that I would not usually do and I was quite pleased with the drawing however it did not look much like her. Fortunately I did do some moredrawing of flowers and I really took a liking to these and decided to draw even more, adding pressed flowers which made the drawing look more realistic and interesting. I also produced a mood board on nature and used pieces of fabric to make it link more with textiles.
As I specialise in textiles I decided to design a tracing for a screen print as one of my ideas that I could consider using for my final piece. My design for a quilt coverincluded drawings of flowers, petals, leaves, plants and even insects such as bumble bees, lady bugs, butterfly’s and caterpillars. I decided to bring insects into my design as they are also a part of nature and I wanted tofurther expand my research. I aimed my design at children because I feel my drawings would appeal more to a child than an adult and this helped me decide on using a pastel colour theme. Once I had got my tracing onto a screen and mixed my chosen colours I went ahead and did some screen prints onto some A4 pieces of pillow cotton, however the colours I had mixed where not bright enough and didn’t really show up onto mychosen fabric - here I could of used a different fabric such as satin as it is a thinner material and does not absorb as much colour. Moreover I began to experiment using my screen, printing with different substances such as binder, puff binder and devore. The print using the puff binder was my favourite however I decided that I didn’t want to use my print at all for my final piece and went ahead with more experimentation and research.Towards the end of my research I decided to try something different and went from experimenting with textiles to experimenting with MDF. I decided to draw on the MDF using coloured pencil and I really liked the outcome however I wanted to challenge myself more and decided not to use this idea either for my final piece. This is when my Secondary researched guided me towards my final idea.
When undertaking my secondary research I took a big interest in many artists. The first artist I looked at was Jennifer Collier and straight away I knew I was going to use her as inspiration for my final piece. I created an artist sheet on her recreating her work in my own way and finding out more about the medias and techniques she uses. I think that Jennifer Collier links to my work wonderfully as she uses found objects and I use natural objects and we both create artwork that can be described as “delicate” and “pretty”. Jennifer Collier is the main influence of my work as she uses waxed teabags to create shoes, dresses and gloves and this gave me the idea to experiment with wax and teabags that I can use in my final piece. Another two artists that really influenced my work was Jane LaFazio and embroidery artist Hilary Fayle. Both artist use a form of stitch and this also inspired me to include sewing into my final piece. Moreover I wanted to look at an artist who bases their work completely on dried flowers and after researching in depth I came across an artist named Rebecca Louise Law. She dries out flowers and presents them in unusual ways from hanging them to placing them on the floor. After really looking into her work I took a vast interest indried out flowers and petals and this gave me a completeand final idea for my final piece. From being inspired by Rebecca Law’s dried flowers and Jennifer Colliers wax tea bags to using the idea of Jane LaFazio embroideryand Hillary Fayle’s technique of stitch I came up with one wonderful idea. This was to empty and fill tea bags with dried flower petals and wax over them, by waxing them this would ceil and make them transparent so you can still see the flowers, eventually constructing them by sewing each tea bag together and making a natural window. When placing the attached tea bags towards the light it will represent a window looking out at the beauties of nature. Because I loved this idea so much I knew this was definitely what I wanted to do for my final piece yet I did not know what size or shape tea bag I wanted to use so I experimented and developed my idea by waxing circular and rectangular teabags. I found the circular teabags unusual however the rectangular teabags would fit together and be sewn without leavingany gap, so I decided to use rectangular ones in my final piece. I planned out what colour thread, what size dried flowers and how many teabags I was going to use. Once it was all planned out I started my final piece and 10 hours later it was finished. I was overwhelmed with how lovely my final piece looked and it was worth the time it took.
Overall I really enjoyed this project and I feel once I had caught up at the beginning I managed my time well. I think the work needed for this project was the right amount and I kept up to date with my blog and completed my bibliography. The only thing I would change is to go into more detail with my annotations but apart from this I am very pleased with how my sketchbook, sheets and final piece turned out.
Monday 16 November 2015
Experimentation
Sunday 15 November 2015
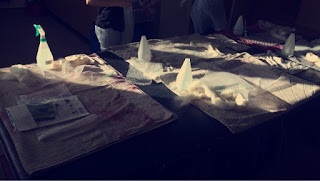
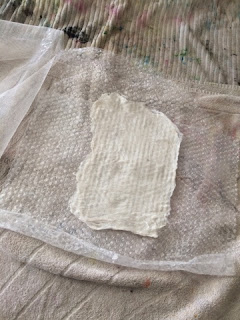
Flower Paper
Wednesday 11 November 2015
Waxing My Tea Bags


Friday 6 November 2015
Procion Dyes
Devore Printing
Devore Printing
This method includes burning away natural fibres of a mixed fibre cloth using a chemical substance. This leaves synthetic backing that results in a relief effect.
The light velvet piece of fabric is a specialist devore fabric that allows the devore paste to be applied onto the fabric without damaging it. The devore paste will most likely be mixed by the print technician, in my case Sharron mixed the paste for our class to use. Before applying the paste onto the fabric we made sure our work area was clean so that no previous substances used in the textile workshop ruined our fabric. Moreover we had to make sure the fabric we where using where not creased as this could prevent the paste from covering the areas that we initially want to cover. After this we taped our fabric down onto the work surface using masking tape.
Firstly we placed our screens over our fabric, applying the devore paste on the screen. After blobbing the right amount of paste onto the screen, we then used a squeegee blade to cover the screen so that it copied the print onto the fabric. We then removed the screen and scrapped the excess paste back into the mixing pot, then we washed our screens along with the squeegee as we did not want to block our screens. Once the screens where clean we had to place them in the drying cupboard for about 15 minutes. The fabric was left hanging to dry naturally to allow the paste to penetrate the fibres. Once the fabric was dry we then needed the paste to fix. to do this we hear pressed our fabric for 17 seconds at 180 degrees. We then took our fabric straight to the sink, washing and gently rubbing it under running water. Gently rubbing the fabrics together removes all the loose fibres eh oh remain on the fabric. We then left it to dry, laying it on a piece of newspaper print Ontario drying rack.
Monday 5 October 2015
Felting
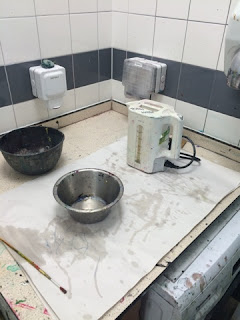
After I was happy with the way my felt looked and made sure it was not going to come apart I rolled it up in a piece of cotton. I then boiled a kettle and placed the rolled up felt in a bowl and waited for the kettle to boil. once the kettle had boiled I poured in into the bowl and times 1 minute on the clock. after the one minute was up I rinsed the boiling rolled up felt under cold water until it was cool. I did this process to make the wool shrink even more and make any unknown loose wool fibres sick together.
Once the rolled up wool was cool enough to handle I squeezed out the water and unrolled the felt. I was very pleased with the outcome and placed it on the drying rack to dry.


